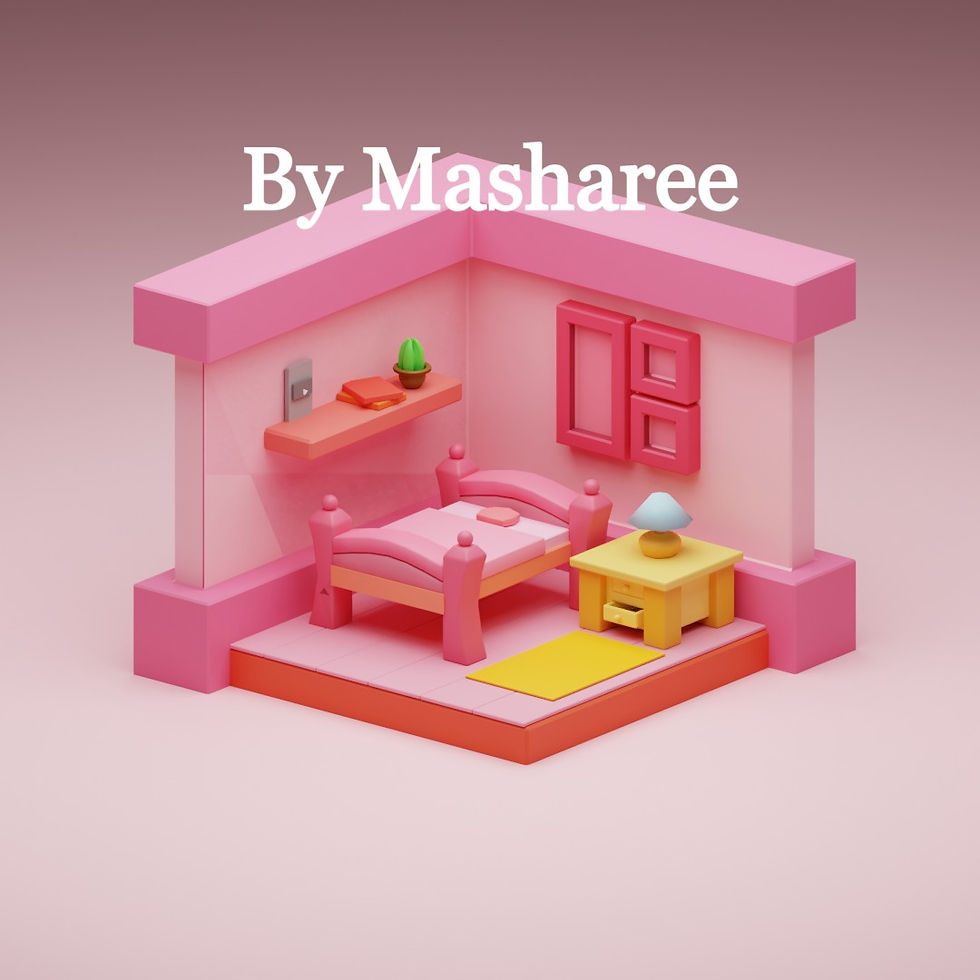
Blender lesson: Mini room!!
- Masharee S
- Mar 27, 2022
- 7 min read
Updated: Mar 31, 2022
Blender Mini Room!
Tutorial : 3DGreenhorn
What I've learned from this tutorial

I did the base for decade since 2021


ตัวฐาน:
เริ่มจากใช้ Object plane เพื่อสร้างฐานของห้อง และเพื่อเพิ่มความหนาให้ฐาน ให้ Add Modifier Solidify
Base:
Started with add object “plane” to make the base of the room then to increase the amount of thickness add the Solidify Modifier and adjust the thickness.


พื้นไม้:
ให้กด Shift + D เพื่อทำสำเนา จากนั้นเปลี่ยนเป็น Edit Mode เพื่อย่อให้เล็กลงและลดความหนาของ Object ด้วย Solidify modifier และขั้นถัดมาต้องเรียง object นี้เพื่อทำให้ดูเหมือนปูพื้นไม้ด้วยการใช้ Array Modifier
Wooden tiles flour:
Press Shift + D to duplicate and change from object mode to edit mode then scale the size down and decrease the thickness.
Move the object to the left and increase the amount by adding an Array Modifier to make it even.


กำแพงตัวห้อง:
เราจะทำห้องสี่เหลี่ยม เราก็ Add object cube ขึ้นมาและลบ faces ที่ไม่จำเป็นออกไปใน Edit Mode
เพื่อให้รูปร่างเหมือนในภาพข้างต้น จากนั้นจะย้าย Object ให้กด G เพื่อขยับขึ้นมาให้ขอบด้านล่างเสมอกับฐาน และเพื่อเพิ่มความสมจริงให้กำแพงดูไม่ลีบจนเกินไปให้ Add Solidify Modifier เพื่อเพิ่มความหนาของกำแพง แล้วกด Even thickness เพื่อทำให้ทำให้ดูสมส่วนมากขึ้น จากนั้นใช้ Loop cut แบ่งศูนย์กลางของกำแพงแล้วใช้ Bevel เพื่อแบ่งโซนในการเลือกขยายเฉพาะด้านบนกับด้านล่างด้วยการกดตัว E หรือ Extrude
จากนั้นเพื่อทำให้กำแพงดูมนและไม่แข็งจนเกินไปให้ Add Bevel Modifier
The Walls:
First, add a Cube object and select some faces then delete it in Edit Mode just like what you see in the finishing process.
Then move the object by pressing G and move it up or down to make sure that the lower part of the cube is connected with the base and now we have the plain wall.
To make it thicker use Solidify modifier and increase the thickness, it is not gonna be perfect for the first time after you use Solidify modifier it will be weird so you might need to press G and adjust until it feels right for you.
And then the Next-Level… (from aespa (girl group) song-Next Level.) Um NO I mean the next step is to use a loop cut the wall to make diameter then use bevel and move it up to divide parts.
And the last step is to Extrude the top and bottom of the wall to make different thickness.
ทำกรอบรูป:
เลือก Faces (หน้าของ Object) ของกำแพงแล้ว Shift + D แล้วกด P + selection เพื่อแยกให้มันออกจากกัน จากนั้นให้เรา Scale แผ่นนั้นลงมาให้มีความรู้สึกเหมือนกรอบรู้ และยืดหรือเพิ่มความหน้าด้วยการกด E (Extrude) ใช้ inset face เพื่อตีกรอบข้างในและใช้ Extrude ดันเข้าไป จากนั้นกด Shift + D และย้ายตำแหน่งกรอบรูป จากนั้นจะตกแต่งยังไงก็ได้แต่ตาม Tutorial ให้เลือกเฉพาะด้านล่างของกรอบรูปที่พึ่ง Duplicate มาและกด G + กดแกน Z เพื่อเลื่อนขึ้นไปให้ขนาดมันเล็กลงจากนั้นก็ Shift + D อีกครั้งเพื่อและเลื่อนลงมาให้เท่ากัน ปรับแต่งด้วย G (Move) และก็เลื่อนให้มันเข้ามาชิดกับกำแพงหน่อย
Picture frame:
Select faces from the wall and shift + D + P + selection to separate into another object then scale it down.
Next step is to press E for extrude and then use Inset face to framing the inner frame and extrude it in.
Press shift + D and move it aside then choose the bottom vertices then press G + Z to move up and make it shorter then duplicate again and adjust it by pressing G.
ชั้นวางของ:
เลือก Faces (หน้าของ Object) ของกำแพงแล้วอีกฝั่ง แล้วทำเหมือนกับขั้นตอนที่แล้ว แต่ Scale ให้มันเหมือนกับสี่เหลี่ยมผืนผ้า กด G แล้ว Move ไปช่วงบนๆ ของกำแพง แล้วกด E
ชั้นวางของ:
Select face from the other side of the wall then press shift + D and scale it horizontally and move it up and extrude it.
เตียง:
เป็นจุดที่ใช้เวลากับมันมากที่สุดแล้ว! เริ่มจากการทำฐานเตียงให้ Add Object plane แล้วกด S (Scale) แล้วกด E เพื่อปรับขนาดเตียงบวกกับเพิ่มความหนาให้มันด้วย
Bed:
This part took me very long to make! Start with add object plane then press S to scale in object mode then switch to edit mode and Press E to increase the thickness.
หัวกับปลายเตียง:
จากนั้นให้เรากด Shift + D ที่เตียงและกด S เพื่อย่อ Object ให้เล็กลงแล้วกด G เพื่อย้ายไปอยู่ด้านท้ายเตียง ขั้้นตอนต่อไปที่จะพูดถึงมันยากถึงขั้นที่ทำไปแล้ว 3 รอบ!! ตอนนี้ก็ยังงงอยู่นิดหน่อยว่าทำได้ไง คือการใส่ Loop Cut เข้าไป 5 เพื่ออะไร? เพื่อที่จะทำให้ปลายเตียงมีความโค้งและนู่นขึ้นมาเหมือนกับเตียงเดี่ยวที่เห็นตามร้านฟอนิเจอร์ และหลังจากขั้นตอน Loop Cut ให้เลือกจุดตรงกลางแล้วกด O จากนั้นกด G + Z แล้วใช้วิธีการขยับและเลื่อนเมาส์ควบคู่ไปพร้อมกันจะได้ตามรูปนี้ แต่ตอนแรกที่ทำมันค่อนข้างไม่สมส่วนเพราะไม่ได้เลื่อนลูกกลิ้งเมาส์ กว่าจะเข้าใจก็ลบและทำใหม่ไปตั้งสองรอบ จากนั้นให้เราเลือกช่วงล่างของตัวปลายเตียงและยกเลิกคำสั่งตัว O ไปก่อนแล้วค่อยกด S,Z และ 0 มันจะกลายเป็นปลายเตียงที่ดูสมบูรณ์ขึ้น และเพื่อจบขั้นตอนนี้ให้เลือกช่วงบนของปลายเตียงกด Shift + D จากนั้นกด E เพื่อเลื่อนขึ้นและทำให้มันมีความวาวและมนด้วยการคลิ๊กขวาแล้ว Shade Smooth ขั้นตอนสุดท้ายจริงๆ คือการ Add Mirror Modifier เพื่อสะท้อนอีกด้านนึงของปลายเตียง ทีนี้ก็จะได้หัวเตียงและปลายเตียงที่เท่ากันแต่ปรากฎว่าเกิดปัญหาที่ทำให้ต้องย่อขนาดเตียงลงเพื่อให้มันพอดีกับหัวและปลายเตียง
Bed headboard and bed end:
Next, shift + D and move it up then move it again to the end of the bed.
Add 5 loop cuts and select the middle one, press O to transform properties then press G + Z scroll mouse and move it up, after the transformation press S + Z + 0 to make a flat bottom.
Next, select the face and shift + D and extrude it up then add bevel modifier and switch back to object mode then shade smooth and then add mirror modifier to make an even opposite side of the bed headboard. But it took me an hour to do this! The obstacle is the mirror modifier, after you mirror the object sometimes it does not go how we wanted so you need to adjust it by yourself!
And another obstacle I have is when I scale this object without scrolling the mouse it became not what I follow the tutorial so I redo it 3 times until I realize the right way lol.
ขาเตียง:
เริ่มจากการไป Object Mode แล้ววางตัว 3d Cursor ไว้ที่มุมเตียงด้านใดด้านนึงแล้ว Add plane สลับไป Edit Mode แล้วกด E แล้วดึงขึ้นมามันจะกลายเป็นขาเตียงที่ดูธรรมดาและแข็งทื่อไปหน่อย เลยจะปรับแต่งให้ได้ตามภาพนี้โดยการเพิ่ม 2 Loop Cut แล้วเลือกด้านที่เราจะปรับแต่งแล้วกด G + แกน X เพื่อขยับมันเข้าไปเหมือนในภาพ และเพื่อให้มันสมูทขึ้น เลือกเส้นที่เกิดมาจากการ Loop Cut ทั้งสองอันแล้วใช้อุปกรณ์ Bevel ลากไปทางขวาหรือซ้ายตามสมควรแล้วกลับไป Object Mode เพื่อกด Add Bevel Modifier
กลับมาที่ Edit Mode เราจะทำให้จะอะไรอีกนิดหน่อยคือเราจะเลือก Face ของขาเตียงข้างบนสุด ดึงมันออกมาด้วย Extrude จากนั้นกด Shift + S เพื่อกด 3d Cursor to selected เพื่อวางเป็นจุดที่จะ Add Object เพิ่มไว้แล้วจากนั้นให้ Add UV sphere หรือ วงกลมจากนั้น Scale ลงมาให้เป็นก้อนเล็ก กด G + Z แล้วเลื่อนขึ้นตามภาพ จากนั้นสลับไป Object Mode แล้ว Shade Smooth แต่ถ้าชอบแบบเดิมก็โอเค
แต่ทีนี้เพื่อที่จะเพิ่มขาเตียงในแต่ละมุมเราต้อง Add Mirror Modifier แต่ว่ามันมีปัญหาที่แก้ยังไงก็แก้ไม่ได้คือพอ Add แล้วมันก็ไม่อยู่ในตำแหน่งที่ดีเท่าไหร่ ทั้งอยู่ห่างกันบ้าง อยู่ใกล้กันจนเกินไปบ้างเราจึงได้แก้ปัญหาด้วยการเปลี่ยนมุมเตียงไปอีกทิศและทดลองใช้ Mirror Modifier อีกรอบแต่ไม่ช่วยอะไรเลย 55555555555 เพราะแบบนั้นเลยทำให้ลองอีกวิธีนึงคือเอา Mirror ออกแล้วกด Shift + D เพื่อทำขาเตียงแบบ Manual ทั้ง 4 มุมโดยการ Rotate และ Move ใน Object Mode แต่พอทำอย่างนั้นมันเลยไม่ค่อยสมส่วนและตำแหน่งก็เบี้ยวไปบ้าง
Bed leg:
Go to object mode and press 3d Cursor like what you see in this picture and then add object plane and Press S (scale) it, move to edit mode and extrude it up then add bevel modifier and 2 loop cuts to bend the object in like this.
Next, make the object smooth by choosing the loop cut on the object + bevel it and then move the bevel tool to the right or left as you want and go to object mode to shade smooth.
Next switch to edit mode and select the top face of the object then extrude it up and scale it in then press shift + s and press “3d Cursor to selected” to add a new object called UV sphere or circle and then scale and adjust the position.
Last step is to go to object mode and shade smooth and add mirror modifier but!!! I have a problem with the mirror modifier so I duplicate and move it to the bed corner by myself.
ผ้าห่ม:
ง่ายจัดๆ
เริ่มจาก Shift + D ที่ตัวเตียงจากนั้นให้ Scale ลงมาให้เล็กกว่าเตียงแล้วทำการเลือก Faces ที่ไม่ต้องการออกเพื่อที่จะทำให้มันเหมือนผ้าห่มที่คุมเตียง ต่อมาให้ใช้ Extrude ในการเพิ่มความหนาลงมา เสร็จ!
Blanket :
Very Easy
Start with shift + D on the bed object then scale it and then select some faces and delete it.
Next step is extrude the blanket, adjust the position and you’re done!
หมอน:
เริ่มซับซ้อนนิดหน่อย
เริ่มจาก Shift + D ที่ตัวเตียงเหมือนเดิมจากนั้นให้ Scale ลงมาให้เล็กกว่าเตียงและผ้าห่ม ทำให้มันเป็นก้อน จากนั้นก็ Move ขึ้นไปบนหัวเตียงและเพิ่ม Bevel Modifier ให้มากขึ้น จริงๆ เรา Duplicate object อะไรมาถ้าเราใส่ Modifier มาก่อนแล้วมันก็จะติด Modifier เดิมมาให้ด้วย
และจากนั้นเราก็ได้สังเกตเห็นบางอย่างที่หมอนที่กำลังจะสร้างด้วยความที่มันติดอะไรสักอย่างเลยทำให้มีสี่เหลี่ยมปริศนามากันตรงนี้เอาไว้ (ต้องดูภาพประกอบ) เราเลยทำการ Extrude เข้าไปเพื่อทำรูในหมอนจากนั้นค่อยยืดกลับมา และเพื่อให้มันมีความกลมๆ ขึ้นก็ให้ใช้ Loop Cut ตัดแบ่ง 3 เส้นแนวตั้งแล้วอีกครั้งนึงให้ตัดแบ่งเป็นแนวนอนและกด Scale หรือกด S เพื่อปรับขนาดของมัน
Pillow:
Start with shift + D on the bed object then scale it just like previous step and then increase the bevel in bevel modifier then move it to the top of the bed but I got a problem here, it look like the face got bug I swear I’m really not sure what it is so I redo the same process again then I loop cut on horizontal and vertical and scale it like what you see in the picture.
โต๊ะข้างเตียง :
เริ่มจากเอา 3d Cursor วางไว้ข้างเตียงจากนั้น Add plane
แล้วใช้ตัวช่วย Extrude ยืดขึ้นแล้วหยุด! จากนั้นเราจะทำให้โต๊ะดูมีชั้นเชิงโดยการ Scale ออกมาและ Extrude อีกรอบเพื่อที่จะทำให้มีส่วนที่เอาไว้วางของกับส่วนที่จะทำเป็นลิ้นชัก
จากนั้นจะเริ่มทำขาโต๊ะ ให้เลือก Faces ที่อยู่ข้างบนกด Shift + D แล้วปรับขนาดและตำแหน่งด้วยการกด S แล้ว G เลื่อนไปมุนใดมุมนึงแล้วยืดมันลงด้วย Extrude แล้ว Add Mirror Modifier เพื่อสะท้อนให้ขาโต๊ะในแต่ละมุม และครั้งนี้มันเป๊ะ! ปังโว้ย! แล้วเพื่อแยกให้ขาโต๊ะออกจากตัวลิ้นชัก ให้เรากด P + selection
Put the 3d Cursor next to the bed then add an object plane and extrude it up, cancel selection and scale the top face out and extrude it up again like what you see in this picture.
Next, shift + D the top face then scale it to the corner,
จากนั้นจะทำตัวลิ้นชัก เริ่มจากกด Alt + X เพื่อทำให้เราเห็นภาพรวมในแบบ X-ray คือเห็นข้างในตัว Object แบบผ่านทะลุ แล้วจากนั้นให้เลือก Faces ที่อยู่ด้านล่างสุดของตัว Cube จากนั้นให้เลื่อนขึ้นโดยกด G แล้วลากขึ้น
and extrude it down to make a leg then add mirror modifier to multiply the amount of table legs and this time it is work oh my god so amazing.
Next part we are going to focus on the table body, alt + X to see the X-ray vision and then select the bottom face of the table and extrude it up.
จากนั้นมาที่ด้านหน้าของตัวลิ้นชัก เพื่อที่จะทำช่องของลิ้นชักให้มี 2 อันเราต้องทำกรอบให้มันก่อนด้วยการกด I สองครั้ง ย่อให้ได้ขนาดที่ต้องการแล้วจากนั้นกด E เพื่อดันเข้าไปข้างในให้เกิดช่องลิ้นชักจากนั้นเลือกแค่ Face ที่อยู่ข้างในสุดตามรูปแล้ว Extrude ออกมา เพื่อให้มันดูเหมือนว่ามีคนอยู่ที่นี่แล้วใช้มันจริงๆ ก็ลองกด G แล้วเลื่อนกล่องลิ้นชักข้างล่างออกมา แล้วถ้าเห็นตามภาพ เกะลิ้นชักยังเป็นแค่ก้อนสี่เหลี่ยม ให้ใช้ Inset Face และ Extrude ตรง Face ข้างบน
Move on to the front part, select the front face and press I 2 times to double the inset face then extrude it in and cancel the selection and select the inner face and extrude it out to make a drawer and press G and the X axis to adjust the position.
After that, choose the top face of the drawer below and then use inset face to framing the hole of it and then extrude it down
แล้วเราจะเพิ่มตัวจับลิ้นชักโดยเอา 3d Cursor มาไว้ตำแหน่งและปรับขนาดตามที่ต้องการ
and press the 3d Cursor in front of it and add UV sphere to both of them and adjust it by using shortcut G,S.
เริ่มจากเอา 3d Cursor ไปวางไว้บนโต๊ะและเพิ่ม UV sphere จากนั้นกด O กับ G เพื่อปรับรูปทรงให้เหมือนในรูปเพราะถ้ากลมไปในความเป็นจริงก็ตั้งไม่ได้แน่นอน ทีนี้ขั้นต่อไปให้เลือกจุดช่วงบนของวงกลมแล้วกด Delete Vertex เพื่อสร้างช่องว่างจากให้กด E ลากขึ้น รูปร่างตอนนี้เหมือนอะไรลองทายดู!
ถัดมาให้ใส่ Cylinder แล้วเปลี่ยน Vertices เป็น 8 กด S แล้วเลือก Face ข้างบนกด S เพื่อทำให้มันดูเหมือนทรงกรวย แล้วมันจะเหมือนโคมไฟ!
Put the 3d Cursor on top of the table then add UV sphere and press O + G + Z axis then move it by scrolling your mouse to make the circle look stable then select the vertices on top and right click, select “delete vertices” then extrude it up.
Last step is adding the cylinder, change the vertices to 8 then scale it and select the top face and press G to move it in to make it thinner.
กระบองเพชร
เริ่มจากเพิ่ม Cylinder จากนั้นให้ปรับขนาดแล้วเลือกตำแหน่งที่เหมาะ เลือก Face ด้านล่างแล้วกด S แล้วย่อมันลงเพื่อให้เหมือนภาพ ที่ทำแบบนี้เพราะเรากำลังจะทำกระถ่างกระบองเพรช!
เลือก Face ด้านบนแล้วกด S แล้วลากออกกด E ลากขึ้นกด I เพื่อสร้างกรอบวงกลมข้างในเพื่อที่จะดึงมันลงมากลายเป็นช่องที่เอาไว้ใส่กระบองเพรช แล้วอีกครั้งที่ต้อง “เลือก Face ด้านล่างแล้วกด S แล้วย่อมันลงเพื่อให้เหมือนภาพ” เราจะทำให้กระถ่างต้นไม้ให้ดูกลมๆ นูนๆ เราจะ Loop Cut ตามภาพแล้วกด S สลับกลับไป Object Mode แล้ว Shade Smooth
เพิ่ม UV sphere กด S แล้วปรับขนาดด้วยแกน X กับ Y จากนั้นไป Edit mode เลือกเส้นที่ตัดกันสี่เส้นตามในภาพแล้วกด S กลับไปที่ Object mode แล้ว Shade Smooth
แต่กระบองเพชรนี้มันแปลกที่มันบุ๋มลงไปเหมือนมะเฟือง เฮ้อ
ง่ายมากกกกกกกกกกกกกกกกกกกกกกกก+1M
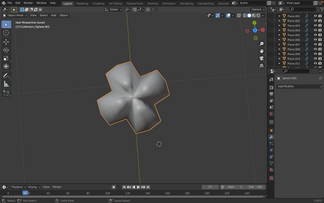
เพียงแค่เพิ่ม plane ใน Object Mode กด E ลากขึ้นใส่ Bevel Modifier ปรับแต่งระดับให้มนแล้ว Shift + D กด G ลากขึ้น แล้ว Rotate จบ!
อันนี้ใช้เวลานานเพราะงงกับการเพิ่ม Cylinder
ให้เริ่มจากเพิ่ม Cube ปรับขนาดด้วยการกด S (ตอนแรกต้องการที่จะ Rotate ให้มันเอียงแล้วก็ทำตามตัวอย่างแต่ปรากฎว่างงนิดหน่อยเลยให้มันตั้งตรงดีกว่า) แล้วจากนั้นให้ Shift + D แล้ว S เพื่อทำให้เป็นกรอบสี่เหลียมคล้ายหน้าโลโก Youtubeถ้าจำไม่ผิด ต้องกด Shift + S เพื่อเพิ่ม Cylinder เปลี่ยน Vertices เป็น 3 แล้วกด S เพื่อทำโล่ Youtube ให้เสร็จสมบูรณ์
การจัดกล้อง
เริ่มจากเพิ่ม Object กล้อง
เลือกเป็น 1080 ที่ Output Property (Icon รูปปริ๊นเตอร์) เพื่อปรับขนาดกล้อง ที่เลือก Size นี้ก็เพื่อทำให้ภาพที่ Render ออกมาเป็นแนว Isomatic
ไป View - Align view - Align active Camera to view เพื่อตรวจสอบมุมมองที่ถูกต้อง
เพื่อทำให้ความความ Isomatic มากขึ้นให้กดไปที่กล้องก่อนแล้วไปที่ Icon รูปกล้อง เปลี่ยน Perspective เป็น Orthographic
เปลี่ยนเป็น Render Mode หรือ Viewport Shading
การจัดไฟ
เพิ่มไฟชนิด Area
ปรับความสว่างเป็น 500 โวลล์ตามตัวอย่าง
กด G เพื่อเลื่อนไฟขึ้นสูงเหนือห้องแล้ว Shift + D แล้วเลื่อนให้สูงขึ้นแล้วขยับไปด้านหลังของห้อง
เสร็จดิคะรออะไร
การ Add Material
คือการลงสีและการเปลี่ยน Texture ของโมเดล
การเพิ่ม Material ให้กดบวกด้านขวาเพิ่ม Object เข้าไปก่อนตามด้วยบวกด้านล่างที่เขียนว่า New เพื่อเพิ่ม Material
การแยก Material ใน Object เดียวกัน ไป Edit Mode เลือกฉะเพาะจุด กดบวกด้านขวา กดบวกข้างล่างแล้วกด Assign
จบ!
เพื่อให้เสร็จสมบูรณ์
ไปที่ Render Property
เปลี่ยนจาก Eevee เป็น Cycle มันคือชนิดการปรับสีและการทำให้ภาพเสร็จสมบูรณ์แต่การ Render แบบ Cycle จะทำให้ภาพดูสมจริงกว่าส่วน Eevee เอาไว้ดูภาพรวม
มีการปรับตำแหน่งชั้นวางนิดหน่อย จากนั้น
ไปมุมซ้ายของบนที่เขียนว่า Render
กด Render Image
รอ
Save เข้าเครื่องได้
เสร็จจจจจจจจ


Comments